
How to Service an Air Cooler at Home
You can service an air cooler at home by cleaning its accessible water tank, inspecting the cooling pads, removing surface dust and checking for visible leaks or blocked airflow. Before starting, switch off the cooler and unplug it from the electrical socket.
Routine cleaning can help keep an air cooler in good condition, but it is not a substitute for repairing electrical, motor or internal mechanical faults. Always follow the owner’s manual for your specific model because removable parts, cleaning methods and maintenance requirements vary.
What You Need Before Servicing Your Air Cooler
For basic cleaning, keep the following items ready:
- A soft cloth or sponge
- Clean water
- A small, soft brush for accessible dry surfaces
- A suitable container or drain arrangement for removing water
- The air cooler’s owner’s manual
Use a mild cleaning product only if the manufacturer permits it for the relevant component. Do not assume that a cleaning chemical, descaler or disinfectant is suitable for every cooler.
Step 1: Switch Off and Unplug the Cooler
Safety comes first whenever you clean an electrical appliance that uses water.
- Switch off the air cooler.
- Unplug its power cord from the socket.
- Keep the plug, socket, controls and electrical connections away from water.
- Allow any recently operated components to cool before handling them.
- Place the cooler where draining water will not damage the floor or nearby belongings.
Never clean the inside of a connected appliance. Do not remove covers or open internal electrical compartments to access components.
If the cord or plug is damaged, the cooler gives an electric shock or tingling sensation, or you notice a burning smell, stop using it. Do not continue with routine maintenance until the problem has been assessed.
Step 2: Drain and Clean the Water Tank
The water tank can accumulate dirt, sediment, mineral deposits and residue, particularly during frequent use.
- Confirm that the cooler is switched off and unplugged.
- Drain the old water using the drain method described in the owner’s manual.
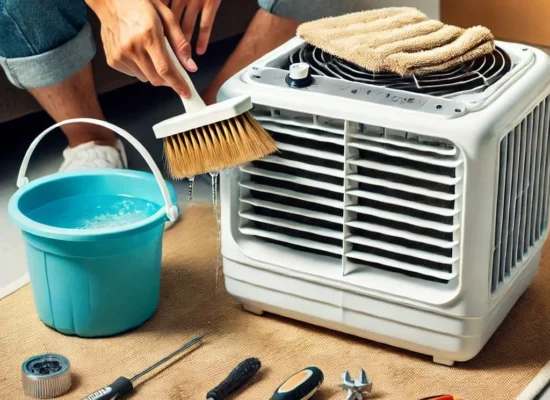
- Wipe accessible tank surfaces with a soft cloth or sponge.
- Remove visible dirt without damaging the tank or surrounding parts.
- Use only a cleaner approved for the tank material and your cooler model.
- Rinse the tank as directed so cleaning residue does not remain.
- Refit any accessible drain component correctly before refilling.
Avoid reaching into inaccessible spaces or dismantling the cooler to clean the tank. If significant scale or residue cannot be removed using the recommended method, consult the manufacturer or arrange appropriate service.
During extended periods of non-use, drain stagnant water rather than leaving it in the cooler indefinitely.
Step 3: Inspect and Clean the Cooling Pads
Cooling pads allow air to pass through a wetted surface, supporting evaporative cooling. Dust, mineral deposits and deterioration can affect their condition and airflow.
Start with a visual inspection. Look for:
- Heavy dust or visible residue
- Mineral scaling
- Damaged or crumbling material
- Sagging or poor fit
- Persistent unpleasant odours
If the pads are designed to be cleaned by the user, follow the exact removal and cleaning instructions in the owner’s manual. Some models permit rinsing, while others may have different restrictions.
For example, Symphony’s Movicool manual specifies low water pressure for pad cleaning and warns against opening the cooler. These instructions should not be treated as universal instructions for other brands or models.
Do not use vinegar, acids, bleach or other chemicals on cooling pads unless the manufacturer explicitly permits the product and method. Do not force a pad out of its housing.
Allow cleaned parts to drain or dry as directed before reinstalling them. Replace pads only when their condition or the manufacturer’s guidance indicates that replacement is necessary; there is no single replacement interval suitable for every cooler.
Step 4: Clean Accessible Filters and Air Vents
Dust around the air intake and outlet can restrict airflow.
With the cooler unplugged:
- Inspect the exterior air vents for dust or obstructions.
- Remove loose surface dust with a soft cloth or brush.
- Check whether your model has a removable filter.
- Remove and wash a filter only if the manual permits it.
- Allow washable parts to dry as instructed before reinstalling them.
Do not wash components simply because they resemble filters. Avoid directing water into the control panel, motor area, electrical connections or other internal sections.
If airflow remains weak after accessible dust and obstructions have been removed, the problem may require further inspection.
Step 5: Check the Water Supply and Visible Leakage
If your cooler uses a water pump or automatic refill system, check only what is accessible without opening the appliance.
Look for:
- A water tank that needs refilling
- A visibly displaced drain plug
- Water collecting around the base
- Visible leakage around accessible water connections
- Signs that water is not reaching the cooling pads
Refill the tank according to the manual and check that the drain plug is properly positioned. Do not run the cooler with a suspected leak that could allow water to reach electrical components.
Do not open the pump, disconnect internal wiring or attempt electrical pump repairs. If water circulation remains poor or leakage continues, arrange a technical inspection.
Step 6: Check Airflow and Ventilation
An air cooler needs adequate airflow through its cooling system and appropriate ventilation in the room.
After cleaning, check that:
- Air intake and outlet openings are not obstructed.
- Curtains, furniture or other objects are not blocking airflow.
- The cooler has adequate space for air circulation.
- The room has a suitable opening for warm, humid air to leave.
Evaporative cooling may be less effective when indoor humidity is high or ventilation is inadequate. Poor cooling does not automatically mean that a component has failed.
If airflow or cooling remains poor after cleaning and improving ventilation, the cooler may need further diagnosis.
Step 7: Reassemble and Inspect Before Use
Before reconnecting the appliance:
- Check that all user-removable parts have been reinstalled according to the manual.
- Confirm that the drain plug is correctly fitted.
- Make sure accessible cleaned parts are dry as required by the manufacturer.
- Check for visible damage, loose external fittings or remaining obstructions.
- Confirm that the power cord and plug show no visible damage.
Do not operate the cooler if you are unsure whether a component has been refitted correctly or if water may have reached electrical parts. Seek appropriate assistance instead.
Once everything is ready, refill the tank and operate the cooler according to the manufacturer’s instructions.
How Often Should You Service an Air Cooler?
The appropriate maintenance frequency depends on usage, dust levels, water quality and the cooler’s design. Follow the manufacturer’s schedule rather than applying the same interval to every model.
Maintenance task | Suggested approach |
Check the water level and condition | Frequently during regular use |
Inspect the tank for dirt or residue | Regularly during the cooling season |
Inspect cooling pads | Periodically and whenever cooling performance changes |
Clean filters, if fitted | According to the owner’s manual |
Check visible leakage | During routine cleaning |
Inspect air intake and outlet | Whenever airflow appears restricted |
Clean before extended storage | Before putting the cooler away for a long period |
For more general maintenance advice, read our essential air cooler maintenance tips.
Preparing Your Air Cooler for Storage
If you will not use the cooler for an extended period:
- Switch it off and unplug it.
- Drain the water tank.
- Clean accessible tank surfaces.
- Clean or inspect cooling pads according to the manual.
- Remove loose dust from accessible exterior areas.
- Allow components to dry as directed.
- Store the cooler in a clean, dry location where it is protected from excessive dust.
Do not store the cooler with stagnant water inside. If the manufacturer specifies additional storage precautions, follow those instructions.
When Should You Stop DIY Maintenance?
Routine cleaning is suitable for accessible components when the manufacturer permits it. Internal repair is a different task.
Stop using the cooler and seek appropriate professional assistance if you notice:
- A damaged power cord or plug
- A burning smell or electric shock
- Repeated fuse or circuit-breaker trips
- A motor or fan that fails to operate normally
- Persistent water leakage
- Severe vibration or unusual mechanical noise
- Water reaching electrical components
- A pump that does not circulate water despite appropriate basic checks
- Poor cooling that continues after cleaning and correcting airflow issues
Do not attempt to repair capacitors, motors, internal wiring, electrical controls or other internal components without the appropriate training and equipment.
Electrical Safety Foundation International guidance likewise recommends unplugging appliances before working on them and avoiding electrical work beyond your skill level.
Frequently Asked Questions
Can I service my air cooler at home?
Yes. You can usually perform basic maintenance such as draining and cleaning the accessible water tank, cleaning user-serviceable cooling pads, removing surface dust and checking for visible leaks. Follow the owner’s manual and leave internal electrical or mechanical repairs to appropriately qualified professionals.
How do I clean an air cooler water tank?
Switch off and unplug the cooler, drain the water, clean accessible surfaces using a method suitable for the tank material, and rinse as directed by the manufacturer. Refill with fresh water before use.
Can I wash air cooler cooling pads with water?
Only if the manufacturer’s instructions permit it. Follow the specified removal method and water pressure. Some models have restrictions that do not apply to other coolers.
Can I use vinegar to clean air cooler pads?
Do not assume vinegar is suitable. Acidic cleaners may be inappropriate for certain pad materials or models. Check the owner’s manual before using vinegar, descalers or other cleaning chemicals.
How often should I replace air cooler pads?
There is no universal replacement interval. Inspect their condition and follow the manufacturer’s recommendation. Damage, deterioration or persistent blockage may indicate that replacement should be considered.
Why does my air cooler smell bad?
Stagnant water, residue or dirty cooling pads can contribute to an unpleasant smell. Drain and clean accessible components according to the manual. If the smell persists or resembles burning, stop using the cooler and seek an appropriate inspection.
Why is my air cooler not cooling properly after cleaning?
Check water availability, pad condition, unobstructed airflow and room ventilation. If the problem remains, possible causes include water-circulation problems or a mechanical fault. A technician may need to identify the actual cause.
Can I lubricate the air cooler motor myself?
Do not lubricate or open the motor unless the manufacturer’s instructions explicitly describe a user-serviceable procedure. Motor lubrication and internal mechanical work should otherwise be handled by an appropriately qualified technician.
Conclusion
Servicing an air cooler at home mainly involves safe, routine cleaning: drain the tank, clean accessible surfaces, inspect cooling pads, remove dust from vents and check for visible leaks. Always unplug the appliance before maintenance and follow the instructions for your specific model.
If cleaning does not resolve the problem, or you notice electrical symptoms, persistent leakage or mechanical faults, stop DIY work and arrange an appropriate inspection.
For air cooler repair and maintenance enquiries in Hyderabad and applicable service areas, contact Aircooler Clinic, a unit of FIXNEARME, at 7997100067 or aircoolerclinic@gmail.com. Service availability depends on your location and the appliance’s requirements. Aircooler Clinic provides a doorstep service and does not operate a separate physical service centre.