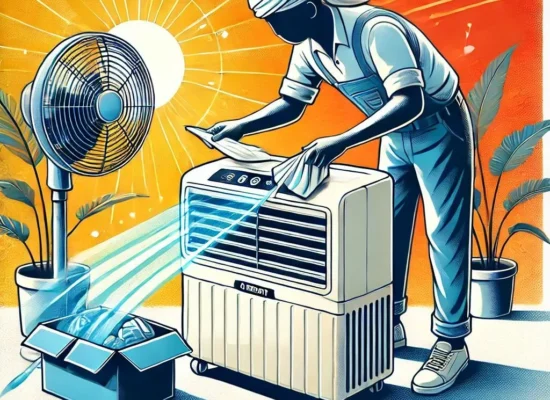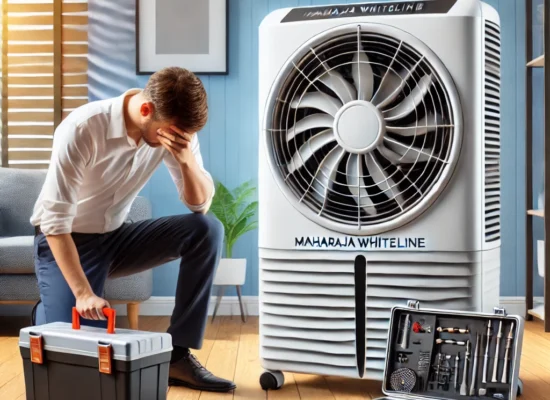
Why Is Your Crompton Air Cooler Dripping Water?
If your Crompton air cooler keeps dripping water, the cause may be an overfilled water tank, a drain-plug problem, a damaged tank or water connection, uneven water distribution, or another component fault. The location of the leak and when it occurs can help narrow down the possibilities, but they do not confirm the exact cause.
Start by switching off the cooler and disconnecting its power supply if you can do so safely. Check the accessible exterior, water level and visible drain area without opening electrical compartments or dismantling internal components. If water has reached electrical parts, the cooler has visible damage, or the leak continues, stop using it and arrange a professional inspection.
This guide explains the common reasons for water dripping from a Crompton cooler, the checks an ordinary user can perform safely, and when further assistance may be needed.
Common Reasons a Crompton Air Cooler Drips Water
Water around an air cooler does not always mean that the water pump has failed. Several different problems can produce similar symptoms.
1. The Water Tank Is Overfilled
Adding water above the recommended level may cause it to spill or escape from the intended drainage area.
What to check: With the cooler switched off and unplugged, look at the external water-level indicator, if your model has one. Compare the level with the manufacturer’s instructions.
What to do: If the tank is overfilled, follow the model’s instructions for safely reducing the water level. Do not operate the cooler with water spilling from the tank.
2. The Drain Plug Is Loose or Damaged
A drain plug that does not seal properly may allow water to escape, particularly when the tank contains water.
What to check: Observe the accessible drain area for visible water. If the plug is externally accessible, check its position without forcing or dismantling it.
What to do: Follow the user manual for reseating an accessible drain plug. If the plug is cracked, the surrounding material is damaged, or the leak persists, arrange an inspection rather than attempting an improvised repair.
3. The Water Tank or a Water Connection Is Damaged
A crack, damaged seal or leaking connection may allow water to collect underneath or around the cooler.
What to check: After the appliance is switched off and safely disconnected, observe the tank’s accessible exterior and the surrounding floor. Note where water first appears.
What to do: Do not use adhesives, sealants or other materials as a substitute for a suitable repair without confirming their compatibility with the appliance and its water system. A damaged tank or connection may require professional assessment.
4. Water Is Not Being Distributed Properly
Air coolers circulate water through a system that supplies moisture to the cooling pads. A blockage, misplaced component or other water-distribution problem may lead to uneven wetting or abnormal dripping.
What to check: Look for unusual water accumulation around the accessible exterior. Note whether the problem began after cleaning or moving the cooler.
What to do: Check the manufacturer’s instructions for any permitted user-level maintenance. Do not remove internal panels, force blocked tubing or dismantle the water-distribution system while attempting to identify the cause.
5. The Cooling Pads Are Damaged or Improperly Positioned
Cooling pads are designed to receive and retain water as part of the evaporative cooling process. Damaged or incorrectly positioned pads may contribute to uneven water flow, but visible dripping alone does not prove that the pads need replacement.
What to check: With the cooler switched off and unplugged, inspect only the externally accessible areas. Look for obvious displacement or visible damage without reaching into the fan or removing components contrary to the manual.
What to do: Follow the model-specific cleaning and maintenance instructions. If the pads are damaged, do not fit a replacement until the correct type and dimensions have been established.
6. The Water Pump or Another Internal Component Has a Fault
A pump or circulation problem can affect how water reaches the pads. However, a pump fault should not automatically be assumed to be the cause of a leak.
What to check: Record whether the leak occurs when the cooler is filled but switched off, or whether it appears only during operation. Note any unusual noise or change in cooling performance.
What to do: Leave internal pump inspection, electrical testing and component replacement to an appropriately equipped service professional.
How to Check Where the Water Is Coming From
The pattern of leakage can help determine what needs further investigation. It cannot establish a diagnosis on its own.
When or where water appears | Possible explanation | Appropriate next step |
Water appears after filling the tank | Overfilling, drain leakage or a tank-related issue | Check the recommended fill level and visible drain area |
Water collects beneath the cooler while it is switched off | Drain plug, tank or water-connection leakage | Keep the appliance disconnected and arrange inspection if the source is not obvious |
Water appears mainly during operation | Water distribution, pad positioning or a component-related problem | Stop operation if leakage persists and arrange inspection |
Water is escaping near a damaged panel or connection | Possible physical damage or a leaking connection | Do not dismantle the unit; seek an appropriate assessment |
Water reaches the plug, cable or electrical compartment | Potential electrical hazard | Do not touch wet electrical parts or continue operating the cooler |
These are possible explanations, not model-specific diagnostic rules. Your cooler’s design and the manufacturer’s instructions determine which checks are appropriate.
Safe Steps to Take When Your Crompton Cooler Leaks
Follow this sequence before deciding whether a repair is needed.
Step 1: Stop the Cooler Safely
Switch off the appliance. If the surrounding area is dry and it is safe to do so, disconnect the power supply.
If water is near the plug, socket, cable or electrical compartment, do not touch the wet equipment or attempt to unplug it through standing water. Keep away and obtain appropriate assistance.
Step 2: Protect the Surrounding Area
Keep people away from the wet area and protect nearby items from further water damage, provided this can be done safely. Do not move an electrically connected or waterlogged appliance.
Step 3: Observe the Leakage Pattern
Without opening the appliance, note:
- Where the water first appears.
- Whether the cooler leaks while switched off or only during operation.
- Whether the tank was recently filled or the appliance recently cleaned.
- Whether there is visible damage or unusual noise.
- Whether the cooler also has a cooling or water-circulation problem.
A photograph of the external leak location may help explain the symptom when requesting service.
Step 4: Check the Water Level and Accessible Drain Area
When the cooler is safely disconnected and the surrounding area is dry, check the water level and any externally accessible drain plug according to the user manual.
Do not force a plug, open sealed sections or remove internal parts merely to locate the leak.
Step 5: Consult the Model’s Instructions
Crompton cooler models may differ in their tank layout, water-distribution arrangement and maintenance requirements. Use the manual for your specific model rather than assuming that every cooler can be cleaned or adjusted in the same way.
For general maintenance advice, see Crompton’s guide to making an air cooler last longer.
Step 6: Arrange Inspection if the Leak Continues
If the source remains unclear, the tank or drain area appears damaged, or the cooler continues to leak after permitted user-level checks, arrange a professional inspection. Do not continue operating the appliance to see whether the leak becomes worse.
How to Prevent Water Dripping in a Crompton Air Cooler
Regular maintenance can help identify problems early, although it cannot prevent every component failure.
- Follow the recommended water level. Do not fill the tank beyond the level specified for your model.
- Clean the water tank as instructed. Empty and clean it at the intervals recommended by the manufacturer.
- Maintain the cooling pads. Use the cleaning procedure and replacement guidance appropriate to the installed pad type.
- Observe the drain area. Check for visible damage or leakage during routine external inspection.
- Watch for changes after cleaning or moving the cooler. If dripping starts immediately afterward, report that detail when seeking assistance.
- Use the correct replacement components. Confirm model compatibility before replacing a plug, pad, pump or water connection.
- Stop using damaged equipment. Do not ignore recurring leakage, damaged cables or water near electrical components.
Crompton’s published maintenance guidance discusses pump cleaning, draining the water tank when the cooler is not in use, and regular cooling-pad cleaning. Follow the instructions applicable to your particular model rather than assuming that every model uses the same maintenance procedure.
When Should You Get Professional Help?
Arrange an inspection if:
- The cooler continues leaking after the water level and accessible drain area have been checked.
- A tank, seal, plug or water connection appears damaged.
- The leak appears to come from inside the appliance.
- The pump or water-distribution system may be malfunctioning.
- Water reaches electrical parts, or you notice a burning smell, damaged cable or other electrical warning sign.
- You cannot identify the source without dismantling the cooler.
Do not open electrical compartments, handle exposed wiring, test internal electrical components or attempt motor or pump repairs as DIY work.
For broader information about possible leakage causes, read our guide to fixing water leakage in air coolers.
If the leakage is accompanied by poor cooling, our Crompton cooler cooling-troubleshooting guide covers a related but distinct problem.
Frequently Asked Questions
Why is my Crompton air cooler leaking water from the bottom?
Possible causes include an overfilled tank, a drain-plug problem, a damaged tank or connection, or another water-system fault. Observe where the water first appears and whether the cooler was recently filled or moved. An inspection may be necessary to identify the actual cause.
Why does my air cooler drip water after filling the tank?
The water level may be above the recommended limit, or the tank, drain area or another component may not be sealing correctly. Check the level indicator and the model’s filling instructions. If the leak continues at the correct level, stop using the cooler until the cause has been assessed.
Can a faulty water pump cause a cooler to leak?
A pump or circulation fault may contribute to abnormal water distribution, but leakage does not automatically indicate pump failure. The water tank, drain plug, connections and other components may also need inspection.
Should I replace the cooling pads if my cooler drips water?
Not necessarily. Dripping alone does not establish that the pads are damaged. Check for visible displacement or damage where safe, and consult the manufacturer’s maintenance instructions before deciding whether replacement is appropriate.
Is it safe to use a cooler that is leaking water?
If water is reaching electrical components, the plug, cable or socket, do not continue using the appliance. Stop operation and obtain appropriate assistance. Even when the leak appears to be away from electrical parts, persistent leakage should be investigated before normal use resumes.
How can I prevent recurring water leakage?
Use the recommended fill level, clean the tank and pads according to the manual, observe the drain area, and address visible damage promptly. If leakage recurs despite these steps, arrange an inspection instead of repeatedly topping up or adjusting the tank.
Can I repair the drain plug or water pump myself?
Only perform maintenance explicitly permitted by the user manual and appropriate for ordinary users. Do not dismantle internal components, force damaged parts or attempt electrical repairs. Seek professional assistance when the source of the leak is unclear or a component needs repair or replacement.
How do I arrange Crompton air cooler service in Hyderabad?
You can contact Aircooler Clinic at 7997100067 or email aircoolerclinic@gmail.com to describe the problem and ask whether doorstep service is available for your location and model. The required repair, parts availability and applicable charges should be confirmed before approving the work.
Conclusion
Frequent water dripping from a Crompton air cooler can have several causes, including an excessive water level, a drain-plug issue, damaged water connections, cooling-pad problems or a fault in the water-distribution system. Start with safe external checks and follow your model’s maintenance instructions. Do not assume that a particular component has failed without evidence.
If the cooler continues to leak or water approaches electrical parts, stop using it and arrange an appropriate inspection.
Need help with a leaking Crompton air cooler in Hyderabad?
Contact Aircooler Clinic, a unit of FIXNEARME, to discuss the symptoms and confirm applicable doorstep service availability.
- Phone: 7997100067
- Email: aircoolerclinic@gmail.com
Service availability, the required repair and any applicable charges must be confirmed individually. Aircooler Clinic does not operate a separate physical service center.